Introduction: Is Your iOS System Corrupted
Imagine using your iPhone to reply to a message and the screen freezing. You restart, but the Apple logo remains. Or worse, it restarts repeatedly. Apps crash, screens flicker, and nothing works. These are typical iOS corruption symptoms.
Avoid panic. A “corrupted system” doesn’t break your phone forever. The software—your iPhone or iPad’s brain—has stalled. It could be a poor update, app conflict, or halted process. The good news? Most of these issues can be fixed at home. We’ll cover everything from restarts to Dr.Fone – iOS System Repair software in this article. You can fix your iPhone’s freezing, looping, or unusual behavior here—step by step, without technical language.
Part 1: Diagnosis – Is It Really a Corrupted iOS?
Let’s validate system corruption on your iPhone or iPad before attempting to fix it. A significant issue may be a tiny glitch.
Common iOS Corruption Signs
Here’s how to recognize it.
- Device restarts without reaching the home screen after displaying the Apple logo.
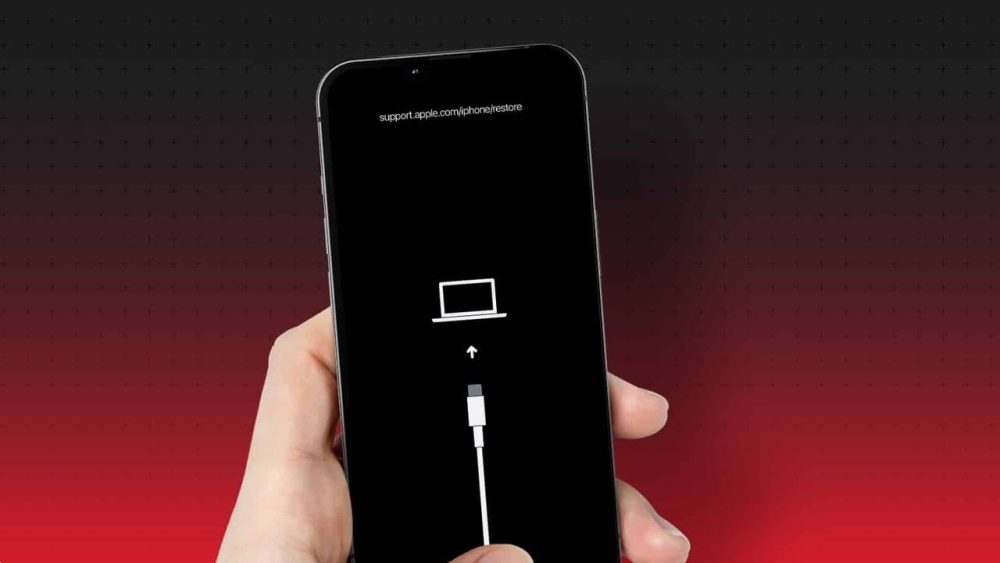
- iPhone repeatedly boots to “Connect to computer” or “iTunes”.
- Even built-in apps, such as Messages and Settings, crash when opened.
- Multiple updates fail with cryptic errors or stall during the update process.
- Frozen touch screen.
- The device may randomly reboot or display a black screen after opening an app or charging.
Rule Out the Basics First
Check these quick things before assuming corruption:
- Inspect for physical deterioration, including cracks or water damage. Hardware degradation may resemble software concerns.
- Low battery levels might cause boot loops and freezes. Keep it plugged in for 30 minutes.
- Try Safe Mode to determine if third-party software is causing the issue.
- Full storage can cause iOS issues.
If these simple checks fail, repair is necessary.
Part 2: The Repair Escalation Ladder – From Simple to Powerful Fixes
Fixing a corrupted iOS system should start with basic steps and escalate as needed. Simplest to hardest steps are below.
Step 1: The Foundational Fixes (No Data Loss)
These first methods won’t delete photographs, messages, or apps.
1.1 Force restart
Force restarts fix iPhone freezes and loops caused by software issues.
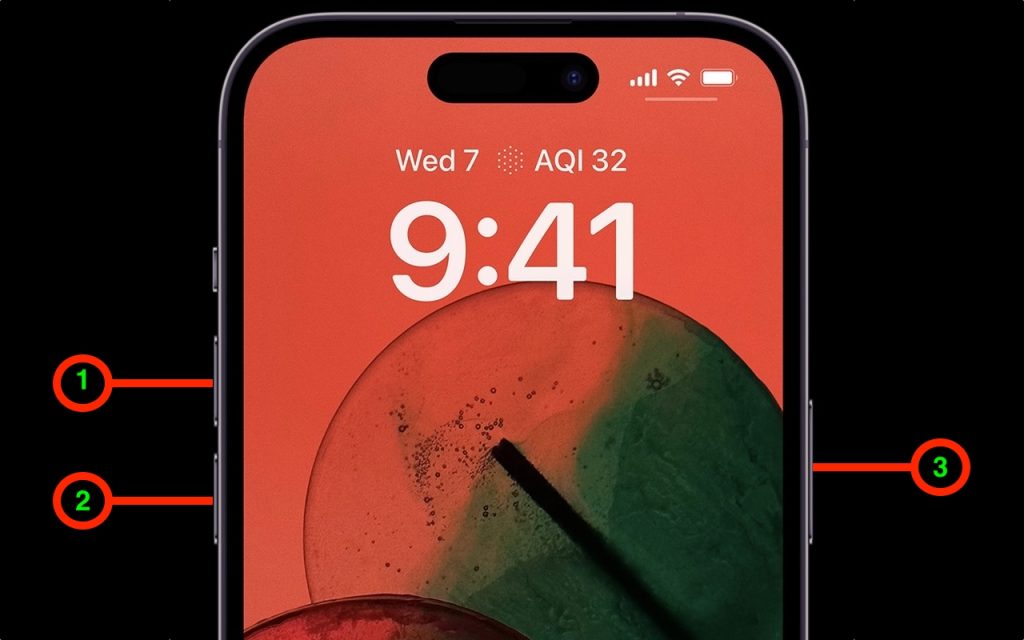
- When using iPhone 8 or later, press and release Volume Up, Volume Down, and Side until the Apple logo displays.
- Hold the Volume Down and Power buttons until the Apple logo appears.
- Hold Home and Power on iPhone 6s or later until the screen goes off and the logo appears.
1.2 Update via Computer
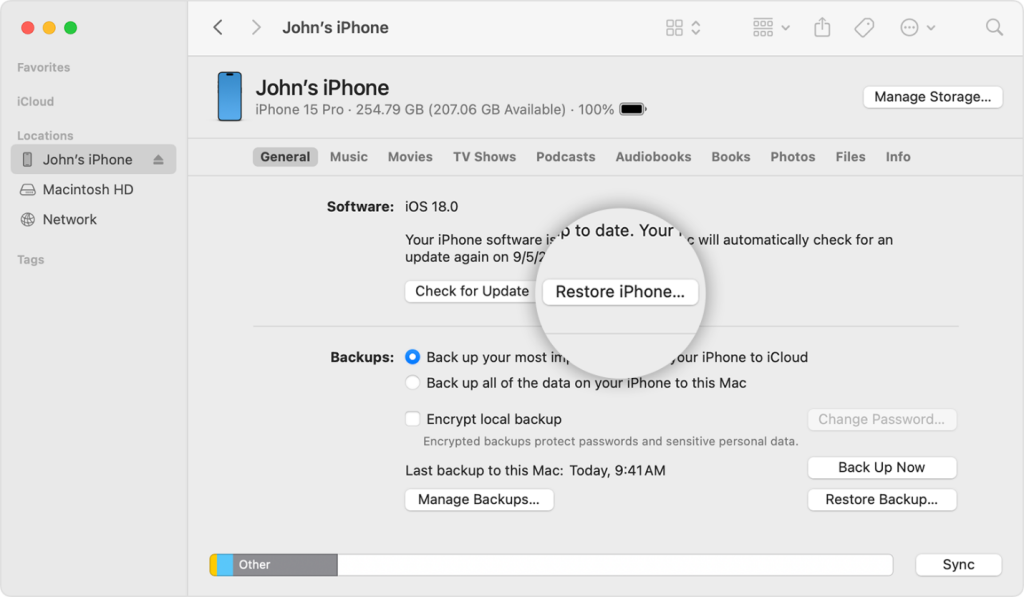
Try a computer if your OTA update failed. Windows and Mac iTunes/Finder wired updates are more stable. How to:
Step 1. Link your iPhone or iPad to your computer.
Step 2. Launch “iTunes/Finder.”
Step 3. Click your device when it appears.
Step 4. Choose “Check for Update”
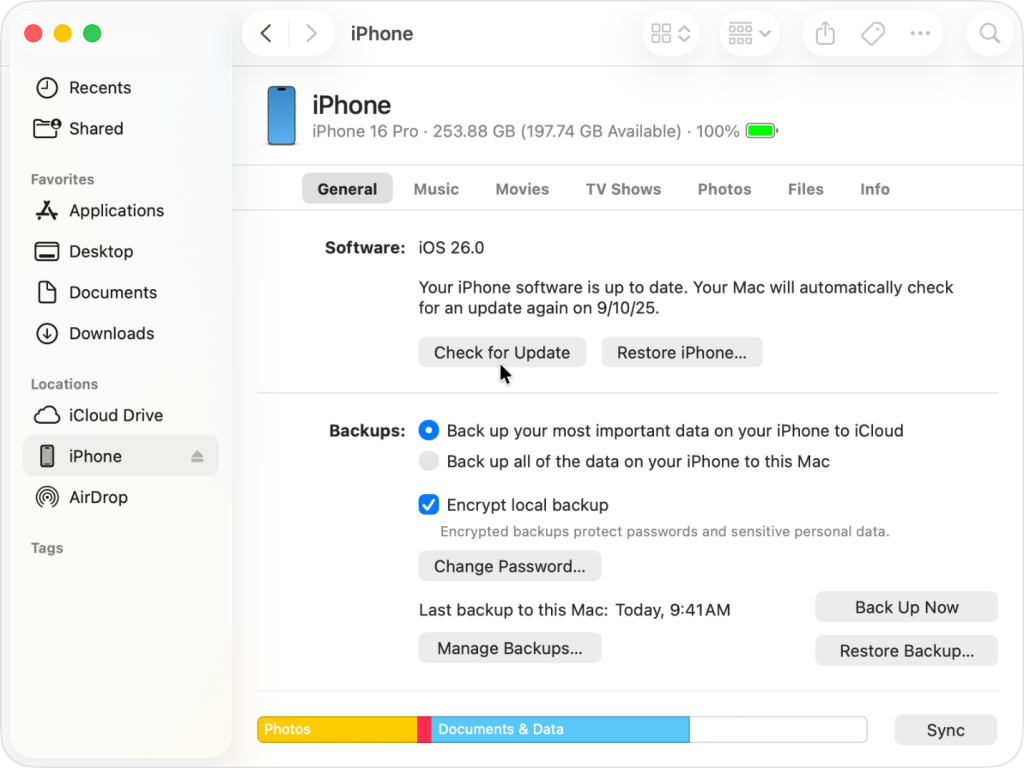
This reinstalls iOS without deleting files and fixes minor system problems.
1.3. Reset All Settings
Reset all settings if your iPhone behaves strangely after a fresh update, but you can still access the Settings app.
Step 1. Navigate to “Settings > General > Transfer or Reset iPhone.”
Step 2. Select “Reset > Reset Network Settings” to reset all settings.
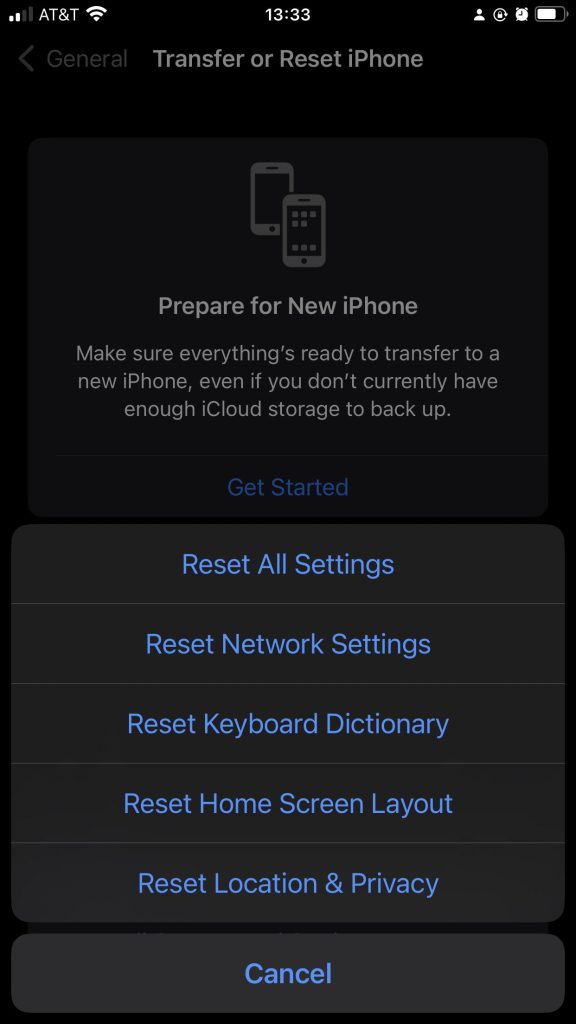
This deletes custom settings, such as Wi-Fi passwords and backgrounds, but preserves data. It fixes issues and app crashes caused by improper settings.
Step 2: Intermediate Solutions – Specialized Tools Like Dr.Fone
If your iPhone is stuck in a boot loop or Recovery Mode and simple procedures fail, the problem is in the system files. Professional iOS repair software is secure, intelligent, and remarkably easy to use.
Wondershare Dr.Fone – System Repair (iOS) can resolve the “iPhone software update failed” error, which prevents iPhone updates from being installed. This professional repair package resolves over 150 iOS issues without requiring a factory reset on your phone.
Key Highlights:
- Resolved 150+ iOS issues, including boot loops, black displays, 1110 issues, and update failures.
- System repair without losing photographs, chats, or data.
- Compatible with iOS 26/iPhone 17 Series.
- No technological skills required—follow the on-screen directions.
- Manage iOS versions without iTunes or jailbreaking.
- Click to enter or leave Recovery Mode.
How It Works – Step-by-Step Guide
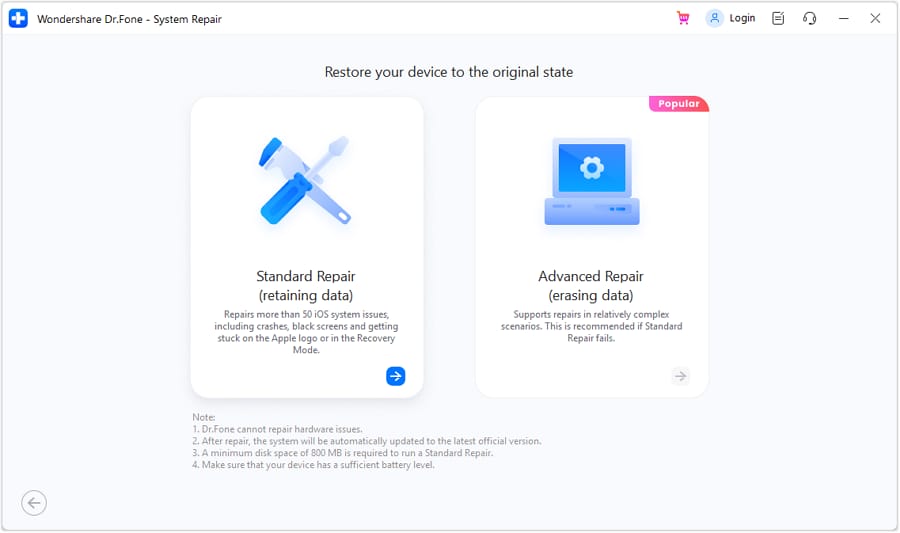
Step 1. Start Wondershare Dr.Fone on your computer. From the main interface, pick “System Repair” from Toolbox. Connect your iPhone or iPad to the PC via USB. Select “iPhone” under iOS repair after detection.

Step 2. Choose “Standard Repair” under “iOS Repair.” This method fixes most system issues such boot loops, program crashes, and update errors without losing data.
Step 3. Follow the on-screen prompts to boot into recovery mode. Dr.Fone automatically detects your device model and recommends firmware. Click “Download” to download and verify iOS firmware.
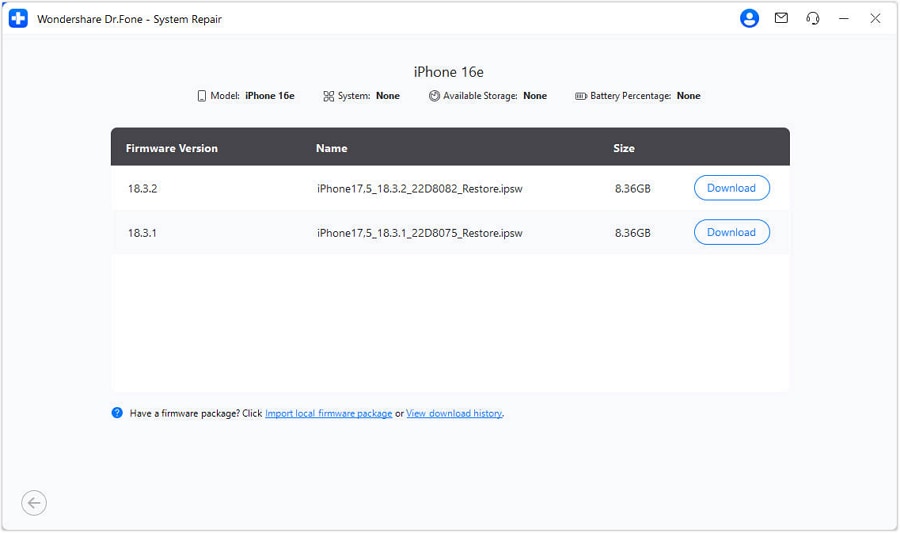
Step 4. When firmware is available, click “Repair Now.” Dr.Fone fixes iPhone system file corruption. Do not disconnect your device until the process is complete. Your iPhone will reboot normally after repair with all your data intact.

Why Choose Dr.Fone Over Traditional Methods?
| Feature | Dr.Fone – iOS System Repair | iTunes Restore |
| Data Safety | No data loss (Standard Mode) | Erases all data |
| Ease of Use | One-click process | Complex manual setup |
| Compatibility | All iOS versions, including 26 | Often limited |
| Repair Time | 10–15 minutes | Up to hours |
| Technical Skills | None needed | Requires experience |
Before taking your iPhone to a repair shop, Dr.Fone is the best alternative for safe, rapid, and discreet repairs at home.
Step 3: The Nuclear Options (Data-Wiping Methods)
The “clean slate” technique is needed if Dr.Fone can’t fix the problem or the system is too damaged to load.
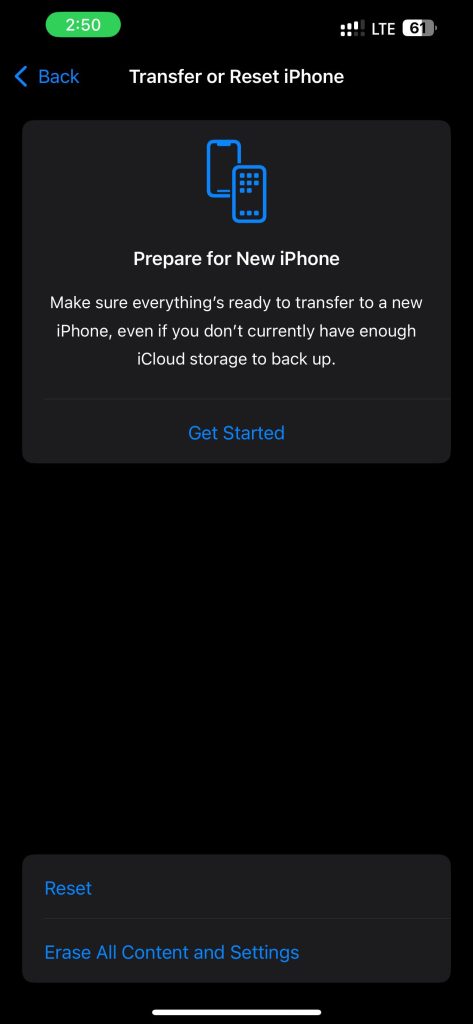
3.1. Erase All Content and Settings
If your iPhone can access Settings, navigate to “Settings > General > Transfer or Reset iPhone > Erase All Content and Settings.”
3.2 Recovery Mode Restore via Computer
Non-starting devices:
Step 1. Link the iPhone to the computer.
Step 2. Launch “iTunes or Finder.”
Step 3. Force the iPhone into “Recovery Mode” (model-specific buttons).
Step 4. When “Connect to iTunes” appears, select “Restore” from your computer.
This installs the latest iOS from scratch. Powerful, but erases all data. Use only when other methods fail.
Part 3: Prevention – Protecting Your iOS System
Now that your iPhone is functional again, keep it that way. Preventing corruption is simpler than mending.
Update Smartly
Before updating, ensure you’re connected to a stable Wi-Fi network and have your device plugged in. Update interruptions are a major source of corruption.
Store Things
Free up 10–15% of storage. A full disk slows the machine and causes update failures.
Download apps carefully
Install just App Store apps. Untrusted websites’ third-party downloads or “configuration profiles” can damage system files.
Back up regularly
This is your best defense. Weekly iCloud Backup or iTunes/Finder. Always keep a working phone backup in case something goes wrong.
Avoid Beta Software Unless You Know What You’re Doing
Betas might be unreliable. If not testing, delete beta profiles.
Conclusion
An iOS system corruption can be a nightmare, but it’s something that can be overcome. Force restarts, upgrades, and trusted applications like Dr.Fone – iOS System Repair can fix most issues in minutes. Start small, backup often, and update wisely. Your iPhone is your lifeline, and with proper care and maintenance, it can last for years.